


The Ultimate Guide to Bikepacking: Combining Strategies and Gear for Every Adventure
Discover the ultimate guide to bikepacking in the UK—covering gear, bag types, packing tips, and the best brands like Altura, Rhinowalk, and Rockbros. Whether you're planning your first trip or a full expedition, this guide helps you pack smart and ride further.

07 June 2025
Share
Introduction
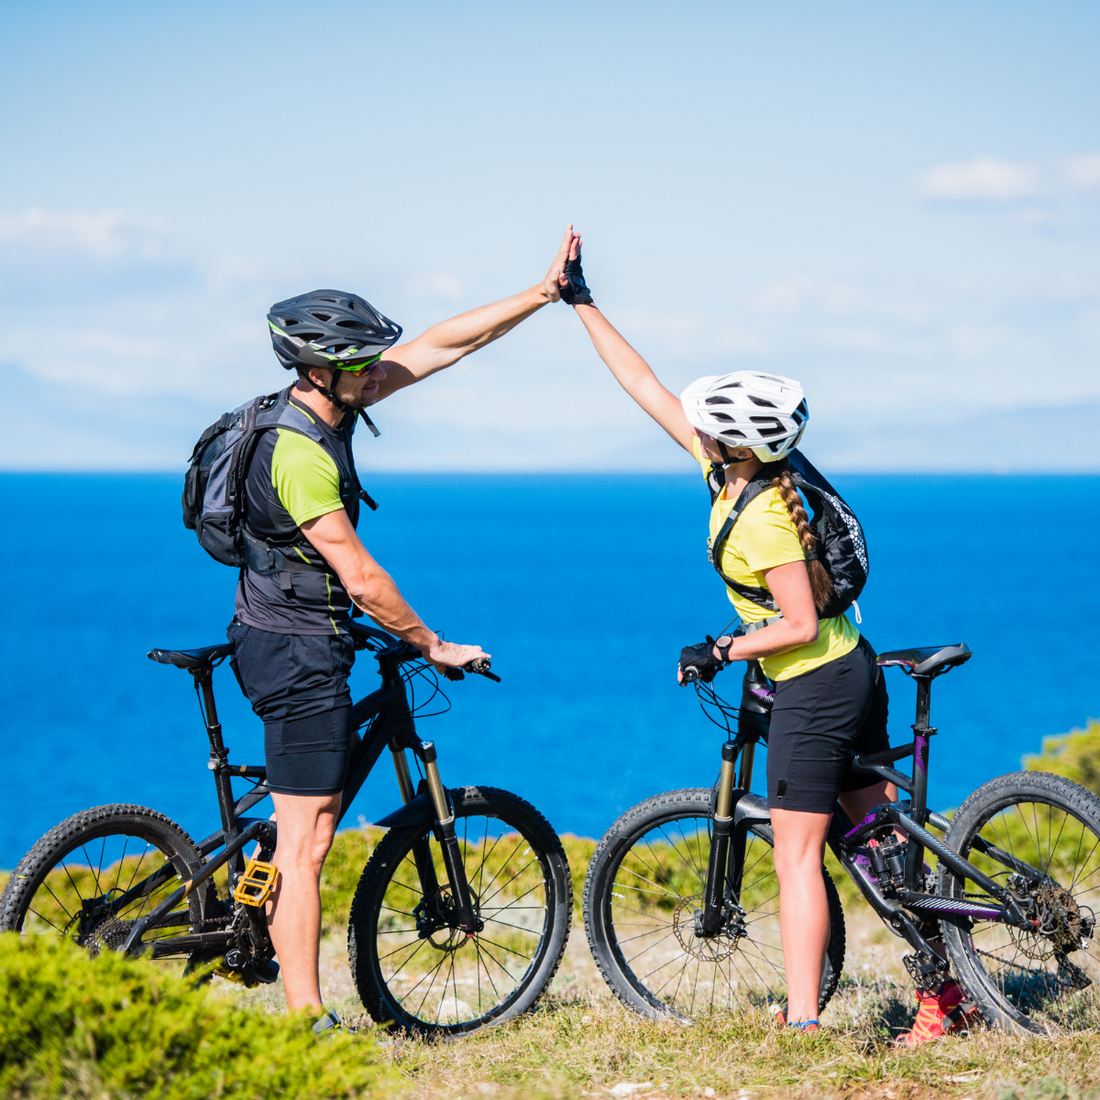
Bikepacking is more than just a way to travel—it’s a philosophy of freedom, self-reliance, and exploration. By combining the best of cycling and camping, it allows adventurers to experience the world from the saddle of a bike while carrying everything they need to survive. The bikepacking community has been steadily growing year over year bikepacking.com, especially in the UK where varied terrain and unpredictable weather make every trip an adventure. As interest in this unique style of travel grows, so does the importance of understanding the different approaches and the gear that makes it possible.
Whether you're just dipping your toes into the bikepacking scene or preparing for a multi-day expedition through remote trails, knowing how to pack and what to pack can make or break your experience. In this ultimate guide, we’ll explore the different styles of bikepacking, dig into smart packing strategies, and compare some of the best bags and brands available (with options to fit every budget). Our goal is to help you plan your next bikepacking trip with confidence and clarity.
Understanding Bikepacking Styles
Bikepacking comes in a few flavors, each with its own mindset and gear approach. Let’s break down the main styles:
Light and Fast
For those who treat their bikepacking adventures like an endurance sport, the light and fast style is all about minimalism and momentum. Riders in this category aim to cover long distances quickly with the least amount of weight. That means trimming down every item to the essentials: no unnecessary luxuries, no heavy gear.
In this style, you might carry just one change of clothes, an ultralight down jacket for warmth, and a compact bivvy sack or one-person ultralight tent. Cooking might be limited to a tiny alcohol stove or even no stove (relying on cold meals). Every gram matters. The idea is to stay nimble, move fast, and let each pedal stroke propel you further.
This approach isn’t just about speed—it’s about self-discipline and creativity. The light-and-fast rider must think critically about each item they bring, seeking multi-use solutions and space-saving gear. If the weather turns or the terrain gets tough, this style will test your preparation and adaptability.
Mid-Weight Touring
This style strikes a balance between comfort and performance. Mid-weight bikepackers carry more gear than their minimalist counterparts but avoid the bulk of a full traditional touring setup. It’s the sweet spot for most riders—enough gear for comfort without overwhelming your bike or body.
Typically, you’ll use all three of the main bikepacking bag types: a handlebar roll, a seat pack, and a frame bag. For example, the handlebar bag holds your sleeping gear; the frame bag is perfect for heavy items like tools, food, or a hydration bladder (keeping weight centered); and the seat pack stores clothes, a compact stove, and additional food. This setup allows for more flexibility and convenience while keeping the bike balanced.
The mid-weight style is ideal for overnight trips or multi-day excursions in mild conditions. You can carry a small tent, a lightweight stove, and a few creature comforts while still riding efficiently. Many bikepackers start here to learn what they truly need on the trail.
Fully Loaded Expeditions
Planning a cross-country ride or tackling a remote backcountry trail with no resupply for days? Then you’re in the fully loaded category. This approach is for serious journeys that require full self-sufficiency and the ability to adapt to unpredictable conditions.
A fully loaded bikepacking rig starts to resemble classic touring, but with modern bikepacking bags. You’ll likely use larger frame bags, oversized seat packs, and handlebar rolls, and maybe add panniers on a rack or fork cages for extra water and food. Every inch of the bike becomes storage real estate. Your gear list will be substantial: a four-season tent or bivvy, a warm sleeping bag, cooking kit with ample fuel, extra layers for cold and wet weather, plenty of food, lots of water (or filters), and a comprehensive repair kit.
While this style demands more effort on climbs and technical trails, it rewards you with the freedom to stay off-grid longer. It’s the bikepacking version of backcountry backpacking—tough, but deeply rewarding. (Many round-the-world cyclists and UK cross-country riders fall into this category, carrying everything needed to handle rain, mud, and weeks on the road.)
Tip: If you go fully loaded, be mindful of how weight affects your bike’s handling. Extra weight means you’ll need to ride slower, especially on descents, to stay in control. Good packing technique (covered below) is critical for safety.
Essential Bikepacking Gear
Now that you know the styles of bikepacking, let’s talk about gear. Your gear choices should match the style of bikepacking you plan to do, but certain essentials apply across the board.
Bikes Suitable for Bikepacking
Not every bike is purpose-built for bikepacking, but the good news is you don’t need the fanciest ride to get started. In fact, almost any bike you already own can potentially be adapted for a bikepacking trip welovecycling.com. The ideal bike is one that fits you well, can handle the terrain you plan to ride, and has the ability to carry gear securely.
That said, some bike types lend themselves to bikepacking better than others:
Gravel Bikes / Cyclocross Bikes: These have drop bars and wider tire clearance, making them great for mixed surfaces and long distances. A gravel bike will feel more stable than a skinny-tire road bike once you hit dirt and gravel roadsrei.com. It’s a top choice for routes like forest tracks, canal paths, or events like the Transcontinental.
Hardtail Mountain Bikes: A hardtail (front suspension) or fully rigid MTB can tackle rough trails and singletrack. They are heavier and slower on pavement, but offer comfort and control on loose or rocky descentsrei.com. If you’re riding UK bridleways, Lake District rock gardens, or Scottish Highland trails, a hardtail is a solid pick.
Adventure/Touring Bikes: Sturdy touring bikes (often steel) can work for bikepacking, especially on gentler terrain or if you plan to use racks and panniers. They usually have multiple mounting points for racks and bottles. Just note that on very rough off-road sections, a touring bike’s geometry might feel less agile than a mountain or gravel bike.
Key features to look for in a bikepacking bike:
Wide Tire Clearance: To run wider tires (40mm+ for gravel bikes, 2+ inches for MTBs) which provide better traction and comfort on rough terrain.
Mounting Points: Extra eyelets or bosses on the frame and fork for attaching bottle cages, cargo cages, or racks. These are handy for carrying water and gear externally.
Durable Frame Material: Steel and aluminum frames are common for touring and bikepacking due to their durability. Carbon and titanium are lighter options (at higher cost). Steel can be easier to repair in remote areas, whereas carbon saves weight but may not have as many mounting points.
Gearing: Look for low gears (small chainrings, large cogs) for climbing hills with a load. Many off-road bikepackers favor MTB drivetrains or gravel-specific gearing that makes climbing easier.
Remember, you don’t necessarily need a new bike. As one bikepacking expert put it, “the ideal bikepacking bike is one you may already have in your garage”welovecycling.com. It’s absolutely fine to start bikepacking on your old hardtail or a second-hand gravel bike and upgrade later as you refine your style.
(If you are coming from a road cycling or commuting background, be aware that a dedicated road racing bike with very tight geometry and limited tire clearance will be challenging for bikepacking. But many commuters use sturdy hybrid bikes or cyclocross bikes, which can be converted for light touring or bikepacking with the right tires and bags.)
Core Bikepacking Bag Types
The hallmark of bikepacking gear is the use of rackless bags that strap directly to the bike frame (unlike traditional panniers that hang on racks). By ditching heavy racks and panniers, bikepackers keep their setups light and nimble for off-road riding bicyclejunction.co.nz. There are three primary types of bikepacking bags, each serving a different purpose:
Frame Bag: This bag sits in the triangle of your bike frame. It offers excellent balance (low and centered weight) and is great for heavier items. Use it for dense stuff like tools, spare parts, a hydration bladder, food, or electronics. Frame bags come in various sizes to fit different frame shapes; some fill the entire triangle, while others are half-frame bags that leave room for water bottles.
Seat Pack (Saddle Bag): Mounted under your saddle and extending behind the seat, a seat pack is a large dry-bag style pack for lighter, bulky items. It’s perfect for clothing, sleeping gear (like a compact sleeping bag or down jacket), and items you won’t need until camp. Modern seat packs often range from ~5 liters (for light setups) up to 15+ liters for expedition bags. They attach to the seat rails and seatpost with straps. (Pro tip: pack them tightly to avoid swaying, and consider a saddle bag stabilizer bar if carrying a heavy load.)
Handlebar Roll: Strapped to your handlebars, this cylindrical dry bag carries lightweight but bulky gear. Common items here are your tent or bivvy, sleeping pad, and maybe a lightweight sleeping bag if it fits. Keeping this weight low is crucial for steering control. Some handlebar bags are simple dry bags with straps, while others use a harness system. You can also strap additional items outside the roll, like a rain jacket or sandals, for quick access.
In addition to these three, most bikepackers add supplementary bags to organize smaller essentials:
A top tube bag (a small pouch on the top tube near the stem) for snacks, phone, or camera.
Stem bags (little open-topped pouches by your handlebars) for water bottles, snacks, or a camera lens.
Cargo cages on the fork legs to hold extra water bottles or dry bags (useful for fully loaded trips).
By mixing and matching these bag types, you can adapt any bike for multi-day travel without bolt-on racks. And when you do need maximum capacity, you can even blend styles—some riders on long tours use a rear rack and panniers in addition to bikepacking bags on the frame and handlebars, especially for road-focused touring. It’s all about what works for your journey.
Smart Packing Strategies
The art of bikepacking isn’t just about what you pack—it’s about how you pack it. A well-packed bike will handle predictably and keep you comfortable, whereas a poorly packed bike can feel unwieldy or even unsafe. Here are some core principles of efficient packing:
Weight Balance: Keep heavy items low and centered on the bike. This usually means the frame bag is for dense items (tools, food, water) since it sits in the center of the bike. Medium-weight items go in the seat pack (which is higher up but still centered fore/aft). The lightest bulky items go on the handlebars (to avoid affecting steering). Balancing left-right is also key—try to distribute weight evenly so the bike doesn’t pull to one side.
Accessibility: Pack frequently used items in easy-to-reach places. Examples: Snacks, map, phone, or sunscreen in your top tube or stem bag; a rain jacket or windbreaker near the top of a bag or strapped to the outside; your multitool and spare tube in a quickly accessible pocket. Less-needed items (like your sleeping gear or tomorrow’s clothes) can be buried deeper. This way you’re not unpacking everything at each stop.
Compactness and Security: Use compression straps and stuff sacks to reduce volume. Air should be squeezed out of your sleeping bag and clothes (dry sacks with one-way valves or simply sitting on the bag as you seal it works). Secure all straps tightly; a loose strap can lead to bag sway or even get caught in wheels (which is dangerous). Many bikepacking bags have built-in cinch straps—use them to compress the load. Pro Tip: After packing, do a short test ride around the block. Check if anything rubs a tire or bounces excessively, and adjust accordingly.
Finally, less is more when it comes to bikepacking gear. Lay out everything you think you need, then try cutting it by 10-20%. Aim to multi-purpose your gear (e.g., a bandana that serves as a towel, pot holder, and sun protection, or a phone that doubles as your camera and GPS). The lighter and more compact you can go while still being safe and prepared, the more you’ll enjoy the riding part of bikepacking.
Top Bikepacking Bag Brands (and What Makes Them Great)
The bikepacking gear market has exploded with options, from cottage industry makers to established cycling brands. Below we highlight a mix of premium and budget-friendly brands, with something for every rider – and we’ll mention some UK-focused options as well. (We subtly include links to some example products from our shop Bike & Bag, so you can easily explore these items further.)
Altura – Durable and Weather-Resistant Gear (UK)
Altura is a UK-based brand with a reputation for reliable, weatherproof cycling bags. They offer a range of bikepacking bags and commuter bags designed for cyclists who demand both reliability and convenience bikeandbag.com. For instance, the Altura Vortex series of bikepacking bags is fully waterproof and built for the long haul bikeandbag.com – perfect for British bikepackers who can encounter rain at any moment. An example is the Altura Vortex 17L Seatpack, a must-have roll-top saddle bag that offers 100% waterproof protection and rock-solid stability on the bike bikeandbag.com. It keeps your gear safe and dry in any weather, which is critical in the UK climate. Altura’s bags also tend to include thoughtful features like reflective details for visibility and easy-access pockets.
(Altura isn’t just for adventurers – they also make excellent commuter gear. Their heritage and city panniers are popular among urban riders. If you’re looking to invest in one set of bags, Altura gear can often pull double duty for weekday commuting and weekend bikepacking.)
Rhinowalk – Affordable and Practical Adventure Bags
Perfect for those just starting out or on a tighter budget, Rhinowalk offers a variety of functional bike bags without the premium price tag. Despite the lower cost, Rhinowalk gear is known for innovative designs and surprisingly high-quality materials bikeandbag.com. Most of their bags are waterproof or highly water-resistant, using PVC or TPU fabrics and solid construction. For example, their large Waterproof Saddle Bag (available in 10L or 13L sizes) provides big capacity for bikepacking trips at a fraction of the cost of high-end brands (yet it’s designed to endure rugged trails and harsh weather) bikeandbag.com. Riders often find Rhinowalk bags to be top-tier gear at a budget price bikeandbag.com, making them a smart choice for upgrading your setup without breaking the bank.
One hallmark of Rhinowalk is that they include useful extras: many saddle bags come with a removable stabilizer bracket to eliminate sway, and their frame bags have well-thought-out compartment layouts. For someone planning an overnight trip or weekend adventure, Rhinowalk offers an easy entry into bikepacking gear. (They also make commuter-friendly bags and panniers, so again, versatility is a plus.)
Rockbros – Budget-Friendly Innovation
Rockbros is another wallet-friendly brand that has gained a loyal following among bikepackers looking for value. This company (originating from China but now available globally) produces everything from tiny top-tube pouches to large panniers. The quality to price ratio is impressive – many riders report being “very happy” with their Rockbros bags even after plenty of use reddit.com. While Rockbros gear may not have the same prestige or ultra-refined finish as the premium brands, it often surprises people with its durability and features.
For example, Rockbros offers waterproof rear pannier bags (10–18L each) that are roomy, durable, and truly waterproof – perfect for long-distance touring or commuting in wet climates bikeandbag.com. They also have frame bags up to 5–8L that maximize storage in your bike’s triangle, and top tube bags that are great for snacks and phones (some even have touchscreen-friendly phone compartments). Many Rockbros products take inspiration from higher-end designs, so you’ll see things like welded seams, roll-top closures, and even magnetic buckles in some cases, but at a much lower price point.
In short, if you’re on a tight budget or just testing the bikepacking waters, Rockbros gear can get you outfitted for a fraction of the cost. It might not last a decade like the bombproof brands, but plenty of riders get several seasons of hearty use out of their Rockbros kit before anything fails reddit.com. At that point, you’ve likely gotten your money’s worth and then some.
Ortlieb – Bombproof Waterproofing
Ortlieb is the gold standard when it comes to waterproof cycling bags. This German brand has been making panniers and bike bags for decades, and their products are nearly mythical among tourers and bikepackers. Ortlieb’s hallmark is 100% waterproof construction – their high-quality fabrics and high-frequency welded seams are totally waterproof even under a 100,000 mm water column pressure wildbounds.com. In real-world terms, that means Ortlieb bags can handle all-day downpours, river splashes, you name it, and keep your gear bone dry. In fact, Ortlieb’s welded seams are often cited as “unmatched for their consistent waterproofness and durability,” even compared to other brands bikerumor.com.
Ortlieb entered the bikepacking scene with their Bikepacking Series (such as the Ortlieb Seat-Pack, Frame-Pack, and Handlebar-Pack), which adapt their classic waterproof tech to rackless bags. These use roll-top closures and purge valves to let you compress the air out. They’re not the lightest bags on the market, but they are tough. If your route includes unpredictable weather or you simply cannot afford a bag failure, Ortlieb is hard to beat. Many long-haul cyclists (think cross-continental trips) rely on Ortlieb knowing that the gear will last for years. The company also backs their products with a substantial warranty (five years) wildbounds.com.
The only downside? Price. Ortlieb bags are premium, and you’ll pay a premium. But for that cost you get peace of mind. As an example, an Ortlieb Handlebar Pack or Seat Pack will often run £100+ each, whereas a budget brand might be £30–£50. The up-front investment pays off in longevity and performance. If you’re UK-based and plan to face our famously wet weather, investing in Ortlieb is like an insurance policy for your gear.
(Fun fact: Ortlieb’s founder invented his first waterproof pannier after getting soaked on a tour in England back in the early 1980s bikerumor.com. That frustration led to the seam-welding technology that Ortlieb uses to this day – a little piece of Anglo-German bikepacking history!)
Apidura – Ultralight and Endurance Focused
London-based Apidura is a favorite among competitive ultra-distance bikepackers and racers, and for good reason. Their bags are ultralight, sleek, and designed with racing in mind (in fact, they have a dedicated Racing series). Despite the lightweight design, Apidura doesn’t skimp on toughness – the Expedition series, for example, is highly durable and thoroughly waterproof for hardcore expeditions. Apidura was one of the pioneers of modern bikepacking bags in the 2010s, and they continue to innovate in materials and design.
One thing that sets Apidura apart is their strong emphasis on sustainability and ethics in manufacturing. Apidura is a certified B Corp and has been pushing sustainability efforts in their materials and operations. Since 2021, all Apidura products have been made PFC/PFA-free (eliminating harmful chemicals in the fabric coatings) bikepacking.com. They’ve also shifted to recycled packaging and even publish the carbon footprint of their products. Apidura runs a program called Revive, where they refurbish and resell used bags to reduce waste bikepacking.com – a pretty forward-thinking approach in the gear world.
In terms of using the gear, Apidura bags have a reputation for smart, minimalist design. They often forgo extra frills (like many pockets or molle straps) to save weight. Instead, they focus on things like stable mounting, waterproof zippers, and ergonomic shape. The Apidura Racing Saddle Pack, for instance, is stripped-down for lightness and has a narrower profile to avoid sway at high speeds. Meanwhile, the Expedition Frame Pack might include a protected port for routing hydration bladder hoses or dynamo cables – recognizing that expedition riders have specific needs.
While Apidura’s price point is on par with Ortlieb (premium territory), many riders swear by them for ultra-endurance events (Transcontinental, Tour Divide, GBDuro, etc.). If you’re aiming for performance and have the budget, Apidura is a top contender. And as a UK brand, they’re readily available to British customers, with local support.
Restrap – Handmade, Modular, and Customizable (UK)
Yorkshire-based Restrap has carved out a niche with its handcrafted, modular bikepacking bags. All Restrap products are handmade in the UK, reflecting a dedication to quality craftsmanship and local manufacturing timetoride.cc. One of Restrap’s signature features is their holster system: for example, their saddle bag setup consists of a holster that stays attached to the bike and a removable dry bag that slides in and out. This modular design means you can easily pull out the contents (the dry bag) without unstrapping the whole thing from your bike – a convenience many riders appreciate at camp. It also allows you to scale the dry bag size up or down (Restrap offers 8L, 14L, 18L options for the saddle bag holsters) depending on the trip.
Another Restrap hallmark is the use of magnetic buckles and closures. They use Fidlock magnetic clips on many of their bags (for instance, the top tube bags and the buckle that secures the saddle bag holster) which makes opening and closing or attaching bags super easy even with gloves on timetoride.cc. It’s a small touch, but one that exemplifies Restrap’s attention to user experience. Their bags also feature details like reflective accents and optional custom patches.
Restrap’s range covers the full gamut: saddle bags, frame bags, bar bags (including an innovative magnetic buckle dry bag called the Bar Loader), and assorted accessory pouches. They even have cool additions like a clear map pouch that can sit atop your bar bag – great for traditional navigators or storing a smartphone. Since everything is made in-house, they maintain high quality control. The materials are heavy-duty (they use a lot of Cordura and other bombproof fabrics) and the bags are highly water resistant, if not fully waterproof in certain cases.
If supporting local craftsmanship matters to you, or if you want a bag setup that’s easy to take on and off the bike, Restrap is a fantastic choice. Their gear may be a tad heavier than some ultralight rivals, but it’s built to last and comes with a lifetime guarantee. Many UK bikepackers mix Restrap bags into their kit for that blend of style and substance – plus it just feels good knowing your bag was handmade in Yorkshire by a cyclist who knows exactly what you need on the trailtimetoride.cc.
(Other notable brands: Alpkit (UK) offers mid-range bikepacking gear with a focus on value, Revelate Designs (USA) essentially started the bikepacking bag revolution and still make top-tier gear, Topeak and Blackburn provide more affordable mainstream options, and luxury brands like Rapha have even dipped into bikepacking bags. There’s no shortage of choices!)
Tips for a Successful Bikepacking Trip
Finally, let’s cover some practical tips that apply to any bikepacking adventure – regardless of your style or gear. These tips will help ensure your trip is safe, enjoyable, and memorable for the right reasons.
Packing Light and Smart
One of the core tenets of a successful bikepacking trip is finding the balance between packing light and being prepared. It’s a delicate balancing act: bring too much and you’ll be weighed down (and cursing every climb), bring too little and you might find yourself in a tough spot without something essential. Here are a few expert-backed strategies for smart packing:
Make a Checklist & Plan Meals: Create a packing list categorized by Shelter, Sleeping, Clothing, Cooking, Tools/Repair, and Food/Water. Be ruthlessly honest about each item’s importance. Planning meals in advance can trim weight – opt for high-calorie, low-weight foods (dehydrated meals, energy bars, nuts, etc.) and pack just the amount of stove fuel you’ll need. If you’ll pass through towns, you can resupply on food to avoid carrying too many days’ worth.
Embrace Multi-Use Gear: The more uses an item has, the more valuable it is in your pack. A buff can be a headband, neck warmer, dish rag, or sun protection. Your cooking pot can double as a bowl or mug. A lightweight tarp can be an emergency shelter or a dry ground cloth. By choosing versatile items, you reduce the total number of things you need to carry.
Ultralight Upgrades (If Feasible): If you’re committed to long-term bikepacking, investing in some ultralight camping gear can pay off. Swapping a 2.5 kg tent for a 1.2 kg tent, or a heavy synthetic sleeping bag for a lightweight down bag, can shave significant weight. Similarly, lightweight bikepacking-specific sleeping pads and camp stoves exist. These items can be expensive, so prioritize based on your needs (and remember, you can have a great time with budget gear too; it might just weigh a bit more).
Clothing: Versatility Over Quantity: Pack for the expected weather range, not for every possible scenario. For most trips, a good system is: 1 set of riding clothes, 1 set of camp/sleeping clothes, plus a few layered items that work in various conditions. For example, in the UK a typical kit might be: padded shorts, a moisture-wicking jersey or t-shirt, and lightweight socks to ride in; then lightweight long underwear and dry socks for camp. Add a fleece or insulated jacket for cold nights, a waterproof rain jacket (essential in Britain!), and perhaps leg warmers or a buff if it’ll be chilly. This combination can handle a wide range of temperatures by layering. Resist the urge to pack “spare” versions of things you already have – you can always rinse clothes during a trip if needed.
Above all, avoid the trap of packing your fears. It’s easy to say “but what if X happens?” and then overpack for every contingency. Experienced bikepackers learn that good planning and a bit of improvisation can handle most problems on the trail. Carry a basic first-aid kit and the tools to fix common bike issues, but you probably don’t need three backup tubes or a full-size axe or four different jackets. Start a trip with what you think is reasonable; you’ll quickly learn what you never used (leave that at home next time) and what you wished you had. Every trip hones your packing list further.
Securing Your Gear Efficiently
Packing all the right gear won’t help much if it falls off or shifts dangerously while you ride. A silent, snug setup will let you focus on enjoying the ride rather than constantly fiddling with bags. Here are some tips to secure your gear like a pro:
Tighten Straps and Eliminate Sway: After loading each bag, tighten all the compression straps. Pay special attention to the seat pack – these are prone to swaying since they’re cantilevered off the back. Many seat bags have a strap that goes around the seatpost; cinch that very firmly (it helps stabilize side-to-side movement). If you notice your saddle bag still swinging, you can add a DIY fix like a small bungee cord around the bag and seat rails, or invest in a saddle bag stabilizer rack (a lightweight attachment that acts like a mini rack to support the bag).
Distribute Weight Properly: We touched on this in packing strategy, but to reiterate – put heavier dense items in the center (frame bag), medium-weight items in the rear (seat bag), and light bulky items up front (bar bag). For example, a toolkit, spare water bladder, and some food in the frame bag; clothes and sleep kit in the saddle bag; tent or sleeping pad on the bars. This keeps the bike’s center of gravity where it should be and prevents the front wheel from feeling too light or the bike from feeling tail-heavy.
Secure Loose Ends: Strap and buckle ends can flap around in the wind or, worse, get caught in your wheels or drivetrain. Tuck away any loose strap ends – many bags have elastic loops to shove the excess strap into. If not, use a bit of tape or even a small Velcro wrap to keep them bundled. This not only prevents disasters, but also cuts annoying noise. Likewise, ensure zippers on frame bags are closed and any exterior pockets are zipped so nothing bounces out.
Test Ride and Adjust: Before you embark on a long tour or rough trail, do a test ride close to home with your bike fully loaded. Find some bumps or potholes and see how the bike handles. Stop and adjust anything that’s moving too much. It’s much easier to fix packing issues in your garage or neighborhood than out on a remote trail in the rain. Some riders even do an overnight shakedown trip as a practice run to trial their setup.
Routine Checks: On a multi-day journey, make it a habit each morning (or at each major stop) to give the bike a once-over. Feel if any bag has loosened up and tighten its straps. Check that your mounting hardware or Velcro hasn’t slipped. Over dozens of miles, even the best setups can settle and loosen a bit. One minute of checks can save you from a bag dangling in your spokes later on.
By securing your gear well, your bike will ride almost like it’s not even loaded. A properly packed and strapped-down bikepacking rig can handle technical singletrack, bumpy cobblestones, and high-speed descents with ease. When you hit that sweet spot, you’ll forget about the gear and get lost in the joy of the ride — which is exactly the point!
Conclusion
Bikepacking blends the thrill of exploration with the satisfaction of self-reliance. Whether you’re venturing out for a quick overnighter in the local hills or embarking on a months-long transcontinental journey, understanding the different approaches — light and fast, mid-weight touring, or fully loaded — and choosing the right gear will dramatically enhance your experience. By now, you should have a solid grasp on how to pack efficiently, what types of bags to use, and which brands offer gear that fits your budget and needs.
From affordable entry-level options to high-end, expedition-grade setups, the world of bikepacking gear has something for everyone. Brands like Altura, Rhinowalk, and Rockbros offer great value and are perfect for riders in the UK looking for durable gear without a huge price tag. Meanwhile, Ortlieb and Apidura deliver top-tier performance (at a premium) for those who demand the absolute best in waterproofing and ultralight design. And let’s not forget Restrap, which brings handmade quality and modular innovation to the table. By packing smart and securing your gear effectively, you’ll ensure that your time on the bike is spent enjoying the scenery and the ride – not stopping to hunt for a tool at the bottom of a bag or reattach a fallen sleeping roll.
Finally, remember that bikepacking is not about perfection – it’s about discovery. Every trip, whether a success or a “learning experience,” teaches you something new about the road, your bike, and yourself. Maybe you’ll discover a beautiful hidden bridleway in the Peak District, or realize you can fix a broken chain with a multitool at dusk, or simply gain confidence in being self-sufficient. These little victories and lessons are all part of the adventure.
So, pack your bags (now you know how), plan a route that excites you, make sure your bike is tuned up, and get pedaling toward the horizon. The world – or at least the next county over – awaits you with open roads and trails. Happy bikepacking!
FAQs
Q: What’s the difference between bikepacking and traditional bike touring?
A: The terms sometimes overlap, but generally bikepacking refers to carrying gear on the bike without racks and usually going off-road or on mixed terrain. Bikepackers use soft bags strapped to the frame (frame bags, seat packs, etc.) rather than panniers. This keeps the profile narrow and the weight centered for better handling off-road bicyclejunction.co.nz. Traditional bike touring often implies road-focused travel with racks and pannier bags, and usually you can carry more volume (which also means more weight). Touring setups are great for paved routes and huge cargo capacity (think front and rear panniers), while bikepacking setups are ideal for rough trails and a lighter, nimbler load. In short: touring = panniers on racks, often on-road; bikepacking = rackless bags, often off-road and minimalist. Both are awesome ways to travel by bike, but they differ in gear and sometimes in spirit – bikepacking grew out of mountain biking culture and focuses on adventure beyond the tarmac.
Q: Can I use any bike for bikepacking?
A: Pretty much, yes. You can adapt many bikes for bikepacking, especially with the variety of bag mounts available today (velcro straps and bolt-on mounts can fit on most frames). However, some bikes will be more comfortable and efficient depending on your route. If you only have a road racing bike, you’re a bit limited in tire size and gear carrying, but you could still do a credit-card style tour with minimal kit. Ideally, use a bike that fits at least 40 mm tires (to handle gravel/dirt), has decent climbing gears, and has space in the frame for a bag (or at least room on the seatpost and handlebars to strap things). Popular choices are gravel bikes, adventure/all-road bikes, hardtail MTBs, and rigid mountain bikes rei.comrei.com. If you’re buying a bike specifically for bikepacking, consider where you’ll ride most: lots of road -> maybe a touring or gravel bike; lots of dirt -> a hardtail MTB or robust gravel bike. But ultimately, as we said above, the bike you already own might be just fine to start – don’t let not owning a “bikepacking bike” stop you from giving it a go.
Q: How do I keep my gear dry when bikepacking, especially in the UK?
A: Rain is part of the package, especially in places like the UK! The good news is most quality bikepacking bags are designed to be water-resistant or fully waterproof. Look for bags with waterproof materials and welded seams (brands like Ortlieb and Apidura excel at this) wildbounds.com. Roll-top closures are great for sealing out water. If a bag isn’t fully waterproof, you can line it with dry bags or even just heavy-duty plastic bags as an extra layer of protection. For example, some riders use a lightweight dry bag inside a saddle pack to ensure the sleeping gear stays dry. Also, pack sensitive electronics in smaller ziplock or roll-top pouches even if inside a larger bag. During the ride, try to set up your bike so that water has a hard time getting in – e.g., zipper pulls downwards so water doesn’t seep in through the top of a zipper. And finally, if you take a break, throw a poncho or pack cover over the bike if heavy rain is dumping. With a bit of care, your gear should stay dry through anything the skies throw at you.
Q: What should I eat on a bikepacking trip?
A: The key is high-energy, non-perishable, and easy-to-prepare foods. You’re burning a ton of calories riding and you need to refuel. Common bikepacking foods include: trail mix, nuts, energy bars or flapjacks, dried fruit, jerky or other dried meats, and packets of oatmeal or couscous. For dinners, many bikepackers love dehydrated meals (just add boiling water) – they’re lightweight and pack a lot of calories and salt (which you’ll crave) into a small package. Examples are freeze-dried camping meals, instant noodles, or quick-cook pasta sides. Tortillas with peanut butter or tuna are great for lunch, as they don’t squish like bread. If you’ll pass through towns, you can enjoy a pub meal or grab a sandwich to mix it up – no need to eat out of a bag for every meal if civilization is near! Don’t forget hydration: carry enough water and use purification (tablets or filter) if you’ll refill from streams. Also pack some electrolytes (powder or tablets) to add to your water if you’re riding long, especially in hot weather – they help prevent cramps and keep you feeling good.
Q: How do I train or prepare physically for a bikepacking trip?
A: You don’t need to be a super athlete to enjoy bikepacking, but a bit of training helps make the experience fun rather than painful. The best training is simply to ride your bike, gradually increasing your distance and ride time with the kind of load you’ll carry. Start with short rides (10–20 km) with lightly loaded bags to get used to how the bike handles. Over a few weeks, work up to longer rides (50 km, 80 km, etc.) and include hills if your upcoming route has elevation. Back-to-back days are also good practice – try a weekend with a long ride on Saturday and another on Sunday, as multi-day endurance is different from a single day.
Also, practice specific skills: if you plan to ride off-road, do some local trails to improve your bike handling with weight on the bike. If you’ve never camped or cooked outdoors, consider an overnight in your backyard or a car-camping trip to test your tent, sleeping gear, and stove. This “dry run” will reveal any issues (like how to assemble your tent or if your sleeping pad is comfortable enough) before you’re out in the wild.
Don’t neglect basic bike maintenance skills as part of preparation. You should be comfortable fixing a flat tire, repairing a broken chain, adjusting your gears or brakes, and maybe booting a gashed tire. Practice these at home – it builds confidence. Many bikepackers will purposely slightly under-inflate tires or use tougher tires/tubes to reduce puncture risk on a trip, which can be a strategy too.
Overall, remember that bikepacking is as much about mindset as muscle. Start easy, listen to your body on the trip, take breaks when needed, and enjoy the journey. The more you bikepack, the stronger you’ll get – both in legs and in spirit! Safe travels and happy riding.
Next post
How to Choose the Perfect Bikepacking Setup: Expert Tips and Recommendation
Updated on 03 May 2025

